Familiarity with the vehicle in question in New York
When you choose a car locksmith who knows your type of vehicle, like an expert locksmith for a Toyota car, you choose a locksmith who knows your vehicle well, he is a locksmith who knows the locking systems in the car, knows the materials from which it is made and knows the best ways to break in Of your vehicle. It is very important to understand that without a professional understanding of the locksmith with the type of vehicle in question he may make serious mistakes that will cause a lot of damage to the vehicle, like substantial damage to the bin which will require you a large financial outlay to repair it. Therefore, be sure to check the professional experience of the locksmith you choose so that you can be sure that he knows how to perform the burglary in your type of vehicle on the best side.
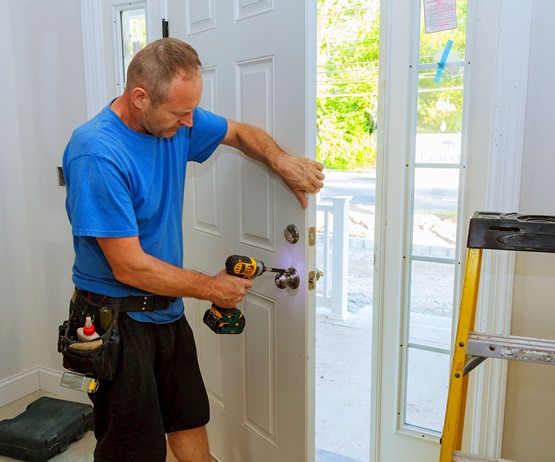
Image source from Locksmith in NYC
Familiarity with the vehicle in question in New York
When you choose a car locksmith who knows your type of vehicle, like an expert locksmith for a Toyota car, you choose a locksmith who knows your vehicle well, he is a locksmith who knows the locking systems in the car, knows the materials from which it is made and knows the best ways to break in Of your vehicle. It is very important to understand that without a professional understanding of the locksmith with the type of vehicle in question he may make serious mistakes that will cause a lot of damage to the vehicle, like substantial damage to the bin which will require you a large financial outlay to repair it. Therefore, be sure to check the professional experience of the locksmith you choose so that you can be sure that he knows how to perform the burglary in your type of vehicle on the best side.
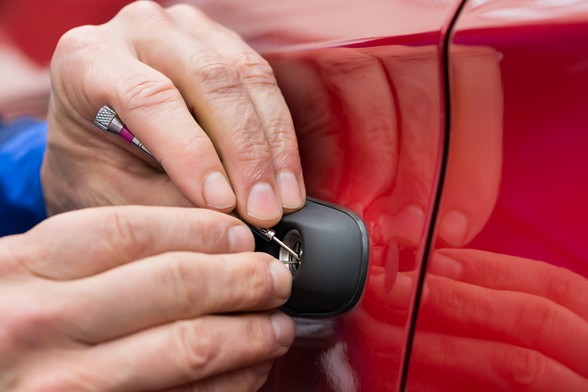
How to unlock a Vehicle
Breaking advanced locks
Even when choosing a locksmith who knows the manufacturer of your vehicle, such as a Toyota vehicle, it is not always enough. If you have a new vehicle from the last few years, surely the locking system in it is very advanced, and even electric, so it is much more difficult to break into this vehicle. It is therefore important to be sure that the locksmith you choose not only superficially knows the type of your vehicle, but specializes in breaking into a locking system like that of your vehicle. For example, if it is a Toyota car with advanced electric locking in order to perform a proper burglary, the locksmith must also have knowledge of car electricity, something that not many specialize in and without professional knowledge in the field of locksmith can cause substantial and extensive damage to your vehicle. So be sure to check carefully the locksmith you choose, ask for recommendations from friends or acquaintances or even get help from your insurance company to find the most professional person such as: a locksmith in New York City who is suitable to perform the work past your vehicle without causing damage.
What is important to note when ordering a car locksmith in NYC?
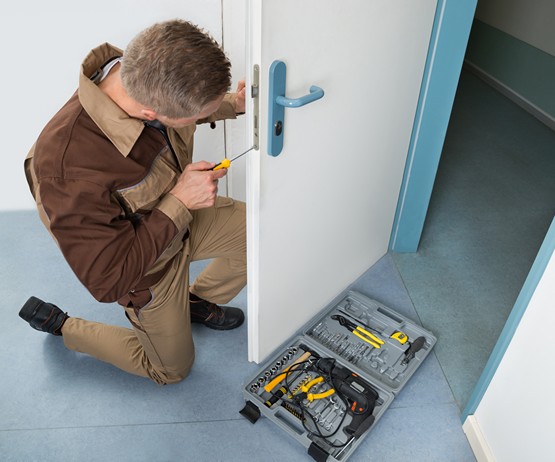
Before you decide to hire a car locksmith it is important that you pay attention to the following parameters: Experience – The experience of a locksmith is a very important parameter before choosing a car locksmith. The richer the locksmith has experience in breaking car locks, the more you can rest assured that your locksmith knows what to do and how to deal with the fault very easily. It is important that you find out beforehand what the locksmith’s experience includes and how many years he has experience in the field. Reputation – If you want to be sure that you choose a professional and experienced locksmith, check the reputation of the locksmith. Reputation testing will be a Google search, customer testimonials about the service, reviews of the locksmith and more. It is important that you pay attention to the reactions of customers who are not satisfied with the services of this locksmith it can turn on a red light to stay away from this locksmith and learn from the mistakes of others. Tools – It is important to check with which hand tools your locksmith comes. If it is an old tool, it is probably a lock that is not sufficiently polished in the field and therefore can not afford electric and sophisticated tools. Of course you will not want to entrust your vehicle to such a person. Fair prices – Do not be tempted by cheap prices. Everything that is cheap is not necessarily good, in many cases the cheap makes you pay more. Cheap prices indicate low quality. Do not compromise on the quality of your locksmith, choose a locksmith with fair prices that are not too high and not too low.
What does a professional locksmith tool set include?
In today’s world we have no choice but to protect our property with advanced and sophisticated locks – but there are cases where the lock turns from an asset into a burden. This of course refers to cases where we forget or lose the key, especially to the front door of the apartment, and in order to enter our house we need the help of a burglar – a licensed burglar, of course, and in short a locksmith.
In what cases does a licensed locksmith help us?
Licensed locksmiths – and it is important to emphasize that when looking for a locksmith in New-York it is mandatory to make sure he has a license from the New-York Police and a certificate from the Locksmiths Association in New-York, and of course he should also have experience and all the necessary professional equipment including a set of Makita tools or other quality brand. The cases in which they constitute a real lifeline are as stated when we lose or forget the key to the apartment, and need a professional burglary. It is very important to contact only expert locksmiths for two reasons: First, an expert locksmith will be able to overcome any lock in a short period of time, and since we have been delayed for a considerable time in any case, this is a serious advantage; And secondly, a skilled burglary prevents unnecessary damage to the door and actually guarantees a minimal cost for those who have lost the key. Similar cases where a licensed and professional locksmith helps us are when a car burglary vow. These situations are also caused mainly due to the loss of a key or forgetfulness, but also due to one malfunction or another, and naturally we will want minimal damage to the vehicle and certainly not unnecessary damage, hence the importance of experience and skill of the locksmith who breaks into our vehicle. Quality equipment is also a must, and in this context it is worth noting that a professional locksmith works with equipment from the most professional companies, such as a set of Makita tools. It is important to emphasize that the above services are provided 24 hours a day and 7 days a week, given the obvious urgency
Top Notch Locksmith & Security Address: 12 Avenue B, New York, NY 10009 Phone: (646) 781-7070